There’s no denying the transformative power of a fresh coat of paint on your interior walls. Whether you’re looking to spruce up a tired room or completely revamp your space, painting is a cost-effective way to make a big impact. However, achieving professional-looking results requires more than just a brush and some paint. There are several key tips and tricks that can help you achieve a flawless finish and avoid common pitfalls.
Key Takeaways:
- Prepare the walls: Start by cleaning the walls thoroughly to remove any dirt or oil that might affect the paint’s adhesion. Repair any holes or cracks with spackling compound and sand them smooth before painting.
- Use the right tools: Invest in high-quality paint brushes, rollers, and painter’s tape to ensure smooth and even application of paint. Take your time to tape off any areas you don’t want to paint for clean, professional-looking results.
- Choose the right paint: Select a high-quality paint that is suitable for the type of wall surface you have (e.g., flat, satin, or semi-gloss). Consider the color and finish carefully to achieve the desired look and feel in your space.
- Apply multiple coats: To achieve a professional finish, apply at least two coats of paint, allowing each coat to dry completely before applying the next one. This will ensure even coverage and a more durable finish.
- Pay attention to details: Take the time to cut in carefully along edges and corners for crisp lines. Don’t rush the painting process, and make sure to allow each coat to dry thoroughly before touching up or adding another layer of paint.
Planning Your Painting Project
Now, before you probe your interior painting project, it’s important to plan ahead to ensure professional-looking results. This planning phase will help you set realistic timeframes and goals, choose the right season for painting, gather necessary supplies, and create a smooth painting process.
Setting Realistic Timeframes and Goals
Painting your interior walls may seem like a simple task, but it’s crucial to set realistic timeframes and goals to avoid rushing through the project. Take into account the size of the room, the number of coats needed, drying times between coats, and any additional preparations required, such as sanding or priming. By setting achievable goals and allowing sufficient time for each step, you’ll be more likely to achieve professional-looking results.
Choosing the Right Season for Painting
On of the most crucial factors in achieving a successful interior paint job is choosing the right season for painting. The ideal time for painting your interior walls is during moderate temperatures with low humidity. Avoid painting in extreme heat or cold, as it can affect the drying time and the application of the paint. Additionally, painting in high humidity can lead to issues such as slow drying, mildew growth, and poor adhesion.
Setting aside the time to paint your interior walls during the right season will not only ensure better paint adhesion and drying but also make the overall painting process more manageable and enjoyable. Consider painting during spring or fall when the weather is milder and more conducive to successful painting results.
Selecting the Right Materials and Tools
There’s no denying that choosing the right materials and tools for your painting project is crucial to achieving a professional-looking result. From selecting the perfect paint type to gathering the imperative tools, each step plays a vital role in the final outcome of your interior walls. Let’s investigate into the key considerations for both paint selection and necessary tools to ensure a successful painting endeavor.
Paint Selection: Types, Finishes, and Colors
The paint selection process involves more than just picking a color that catches your eye. You must also consider the type and finish of the paint to suit the specific needs of the room you’re painting. There are various paint types available, such as latex, acrylic, and oil-based paints, each with its own advantages and ideal applications. When considering finishes, options range from flat, eggshell, satin, to gloss, offering different levels of durability and sheen. Additionally, color choice can significantly impact the overall atmosphere of the room, so it’s imperative to select hues that complement each other and the room’s purpose. Recall, proper preparation of walls before painting is key to a flawless result. Though, always remember to choose high-quality paint for long-lasting results.
| Paint Types | Recommended Usage |
| Latex | Most common, easy cleanup |
| Acrylic | Durability, fast drying |
| Oil-based | High durability, traditional finish |
| Flat Finish | Camouflages imperfections |
| Gloss Finish | Highly durable, easy to clean |
Essential Tools for a Professional Finish
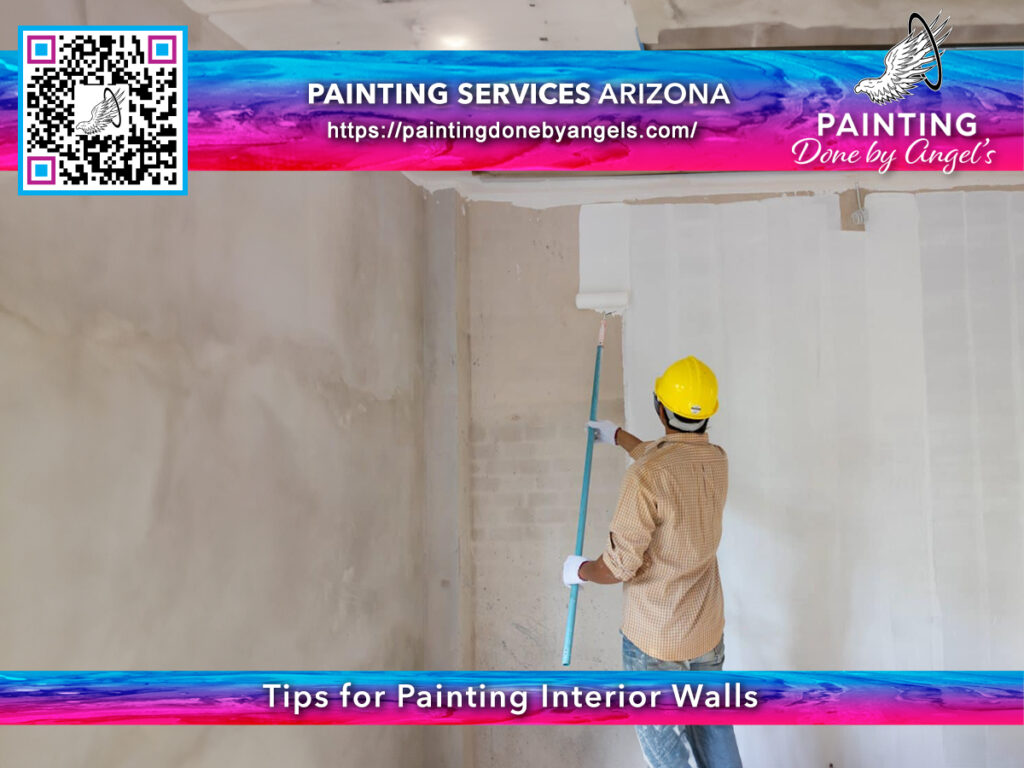
Essential tools are the backbone of any professional-looking paint job. The right equipment can make a significant difference in the efficiency and quality of your project. A roller and extension pole are imperative for covering large wall areas quickly and evenly. A quality paintbrush is crucial for precise cutting in along edges and corners. Additionally, painter’s tape, drop cloths, and sandpaper are indispensable for achieving clean lines, protecting surfaces, and preparing walls for paint. Lastly, don’t forget paint trays, buckets, and stir sticks to ensure a smooth painting process. A well-equipped painter is a prepared painter. Having the right tools on hand can streamline the painting process and help you achieve professional-looking results with ease. Invest in high-quality tools and materials, and you’ll be on your way to transforming your interior walls like a pro.
Additional Equipment: Ladders, Tape, and Protective Gear
Tools like a sturdy ladder are imperative for reaching high places safely, while painter’s tape helps create crisp lines and protect trim and fixtures. Don’t forget to equip yourself with protective gear such as gloves, goggles, and a mask to ensure your safety and comfort throughout the painting process. These additional equipment items may seem small but can make a significant difference in the outcome of your project. This attention to detail in selecting the right tools and equipment underscores your commitment to achieving a professional result. By investing in quality materials and ensuring your safety and comfort, you set the stage for a successful painting experience and stunning interior walls. Dive into learning about What Are The Different Types Of Paint Finishes?
Preparing Your Walls for Painting
Cleaning and Repairing Wall Surfaces
Keep in mind that proper preparation of your walls is imperative for achieving a professional-looking paint job. Clean the walls thoroughly to remove any dirt, grease, or dust that could affect the paint’s adhesion. Use a mild detergent solution and a sponge to wash the walls, then rinse them with clean water and allow them to dry completely.
Inspect the walls for any damages such as cracks, holes, or peeling paint. Repair these issues by filling the cracks and holes with spackling compound, sanding them smooth once dry, and applying a primer to these repaired areas to ensure even coverage of the paint.
Taping and Covering Non-Paint Areas
An important step in preparing your walls for painting is taping and covering areas that you don’t want to be painted. Use painter’s tape to protect baseboards, trim, and any other areas that should not be painted. Cover floors with drop cloths or plastic sheets to prevent paint splatters from ruining the surface.
Wall painting requires precision and attention to detail, especially when dealing with edges and corners. Any areas that are not meant to be painted should be carefully taped off to ensure clean lines and a professional finish. Taking the time to properly tape and cover these non-paint areas will save you from tedious touch-up work later.
Priming Techniques for Various Wall Types
One crucial step before painting is priming your walls, especially if you’re changing colors or painting over a porous surface. Primers help the paint adhere better, hide imperfections, and ensure a more uniform finish. Different wall surfaces require different types of primers, so it’s imperative to choose the right one for your specific needs.
Preparing the walls with the appropriate primer is imperative for the success of your painting project. The table below outlines the different priming techniques for various wall types:
| Wall Type | Recommended Primer |
| New Drywall | PVA primer |
| Previously Painted Walls | Acrylic primer |
| Stained or Smoke-Damaged Walls | Shellac-based primer |
| Bare Wood | Oil-based primer |
| Masonry or Brick | Masonry primer |
Preparing your walls with the right primer is key to achieving a professional finish. The choice of primer will depend on the wall surface you are working with, so make sure to select the appropriate primer for the best results.
Painting Techniques and Strategies
Brush Painting vs. Roller Painting: When to Use Each
When deciding between brush painting and roller painting, consider the size and texture of the surface you are painting. Brush painting is ideal for smaller areas, detailed work, and cutting in around edges and trim. It allows for greater precision and control, making it perfect for intricate designs or corners that a roller may not reach easily.
Roller painting, on the other hand, is best suited for larger wall surfaces to achieve a quicker and more consistent finish. It covers more area in less time and provides a smoother texture compared to brush painting. Roller painting is efficient for applying a base coat or for walls with a smooth finish that do not require detailed work.
Mastering the Art of Edge Work and Trim Painting
With edge work and trim painting, attention to detail is key to achieving a polished look for your interior walls. Take the time to prep the area by taping off edges and protecting trim with painter’s tape. Use a high-quality angled brush for cutting in along edges, corners, and trim. Work carefully and steadily to create clean lines and avoid drips or smudges.
Another necessary tip is to paint with a steady hand and in one continuous motion to prevent a choppy appearance. Practice your technique on a small, inconspicuous area before tackling the main walls to ensure you have the right amount of paint on your brush and the pressure needed for a smooth application.
Achieving Even Coats and Consistent Texture
Roller painting is a popular choice for achieving even coats and consistent texture on interior walls. When using a roller, make sure to load it evenly with paint and apply it in a W or M shape pattern to distribute the paint evenly. Avoid pressing too hard on the roller, as it can create streaks or uneven patches on the wall.
Understanding the drying time of your paint is important when achieving a consistent texture. Make sure to allow each coat to dry completely before applying additional coats to prevent blistering or peeling. Following the manufacturer’s instructions on drying times will help you achieve a professional-looking finish.
Managing Paint and Technique Challenges
Once again, achieving a professional-looking finish when painting your interior walls involves managing common paint and technique challenges. It is crucial to address issues such as drips, streaks, and blotches that can detract from the overall aesthetic appeal of your project.
Dealing with Common Paint Problems: Drips, Streaks, and Blotches
The key to overcoming paint problems like drips, streaks, and blotches is proper preparation and technique. Drips can occur when too much paint is applied in one area or when paint is overloaded on the brush or roller. To prevent drips, ensure that you remove excess paint from your applicator before starting and maintain a consistent pressure while painting. Streaks can result from uneven application or inadequate blending of paint. To avoid streaks, use smooth, overlapping strokes and work in small sections at a time. Similarly, blotches can be caused by inconsistent paint thickness or drying times. To address blotches, apply paint evenly and allow sufficient drying time between coats.
Strategies for Painting Challenging Areas and Surfaces
Streaks often appear when painting challenging areas and surfaces such as corners, edges, or textured walls. To tackle these areas effectively, use the right tools and techniques. For corners and edges, consider using a small brush or an angled paintbrush for precision. When painting textured walls, be sure to work the paint into the crevices with a stippling or dabbing motion. Additionally, when painting over glossy or slick surfaces, such as cabinets or trim, understanding the importance of proper surface preparation and using a high-quality primer can help achieve a smooth and durable finish.
Finishing Touches and Cleanup
Inspecting Your Work and Touching Up Imperfections
Not done yet! Once you’ve completed painting your interior walls, it’s time to inspect your work closely. Your keen eye will help you spot any imperfections such as missed spots, drips, or uneven paint application. Take the time to touch up these areas with a small brush or roller to ensure a seamless finish.
Proper Cleanup and Disposal of Painting Materials
Cleanup is key to achieving a truly professional look. Cleanup begins by carefully removing painter’s tape, protecting any furniture or flooring, and properly cleaning your tools. Dispose of leftover paint, brushes, rollers, and other materials following local regulations. Any paint cans should be properly sealed and stored safely.
When disposing of painting materials, consider donating unused paint to a local charity or community organization to avoid waste. Proper disposal not only helps the environment but also ensures a clutter-free workspace for future projects.
Tips for Maintaining Freshly Painted Walls
Touching up your freshly painted walls is necessary for maintaining their pristine appearance. Any scratches, scuff marks, or stains should be addressed promptly to prevent further damage. Here are some tips for keeping your walls looking their best:
- Regularly dust and wipe down walls with a damp cloth to remove any dirt or grime.
- Use touch-up paint to cover small imperfections or scratches.
- Avoid using harsh chemicals or abrasive materials when cleaning painted walls to prevent damage.
Maintaining your freshly painted walls not only prolongs the life of your paint job but also keeps your space looking well-maintained and welcoming. Take the time to care for your walls, and they will continue to impress for years to come.
To wrap up
As a reminder, achieving professional-looking results when painting your interior walls requires proper preparation, including cleaning and priming the surface, as well as using high-quality tools and materials. Take the time to tape off edges and corners, and use a steady hand when cutting in around trim and ceilings. Be patient and allow sufficient drying time between coats to avoid streaks or smudges. Following these tips will help you achieve a flawless finish that will enhance the overall look of your space.
Recall, practice makes perfect, so don’t be discouraged if your first attempt doesn’t turn out exactly as planned. With a little patience and attention to detail, you can master the art of interior painting and transform your walls into a professional-looking masterpiece. Happy painting!
We at Painting Done by Angel’s are committed to helping those in the Scottsdale & Phoenix, Arizona region make their homes and businesses beautiful. We offer interior and exterior painting solutions with more than 15 years of expertise. Because our family-owned and operated team is bonded, insured, and certified, you can rest assured that your investment is safe and secure with us. As a result, we take great pride in delivering the best results for our customers every time.
FAQ
Q: What are the necessary tools needed for painting interior walls professionally?
A: To achieve professional-looking results when painting your interior walls, you will need the necessary tools such as high-quality brushes, paint rollers, painter’s tape, drop cloths, a ladder, sandpaper, a paint tray, and a stir stick.
Q: How can I prepare my walls before painting for a flawless finish?
A: Proper preparation is key to a professional-looking paint job. Start by cleaning the walls with a mild soap and water solution to remove dirt and grime. Fill any holes or cracks with spackling compound and sand them smooth. After that, prime the walls to ensure better paint adhesion and a smooth finish.
Q: What are some tips for painting techniques to achieve a professional result?
A: When painting your interior walls, use a “W” pattern to apply the paint evenly and avoid visible brush strokes or roller marks. Work in small sections at a time, and always maintain a wet edge to prevent lap marks. Additionally, apply multiple thin coats of paint rather than one thick coat for a smooth and flawless finish.